
 To begin with, I have completely finished 2 of those necklaces that I have been working on forever. I still don't have them listed on etsy yet, but I'll add them soon. I really like the way this pendant worked into the necklace. I utilized Delica seed beads and wove the strands through the artbead and created a lovely branching effect that works really well with the overall piece.
 I finally finished the triangular pendant into a sweet necklace also. The peachy-pink tones worked perfectly with this beadwork necklace that I made. The spiral effect in the necklace also compliments the twisted coils of clay in the pendant. I really love the finished piece!
The last firing included lots of ornaments and beads with some new finishes. This firing I continued the effects that I liked and expanded the tests for additional possibilities. Some of the tests were great, some, though, not-so-great. Once again, there is so much to talk about, that I probably won't get it all shared, but will share what I can.

First of all, I talked about the tendency for my favorite green underglaze to burn out...so, I tried some experiments on little beads. The first oak leaf was finished with dark green underglaze and sbred slip. The green burned out, as was expected. I have a nice bead in shades of very olive and a reddish brown. Nice, but not what I want all the time. The next little bead shows the same underglaze by itself. Very pretty summertime color, but I'm still looking for more options. The next bead was hard to photograph well, but on it, I applied a different underglaze, Amaco hunter green, and brushed just a touch of the sbred slip on it. Beautiful! No color washout and nice late-summer/early-fall tones! The last bead shows that same underglaze by itself, where I think it exhibits a touch more blue undertones. I think it's workable, but I also think the original dark green has its uses provided I don't mix it with iron. Very interesting experiments that have really broadened my color palette as each shade will have its time to shine.
 The next series had some good results too, but also some bad results. I definitely like this ornament, but the results were not what I was hoping for. I applied sbred slip and then the dark green underglaze on the leaves only. I then applied a glossy glaze on the leaves hoping it would protect the green from burnout, but it didn't. I also applied a little copper carb/rutile mix over the top 3 leaves (that's why they still show some green). I honestly like the results. I love the way the dark veins show through the minty green leaves. Nice depth and detail. I even like the way the background leaves lack the green color. It looks like shadows and highlights. Nice contrast.
 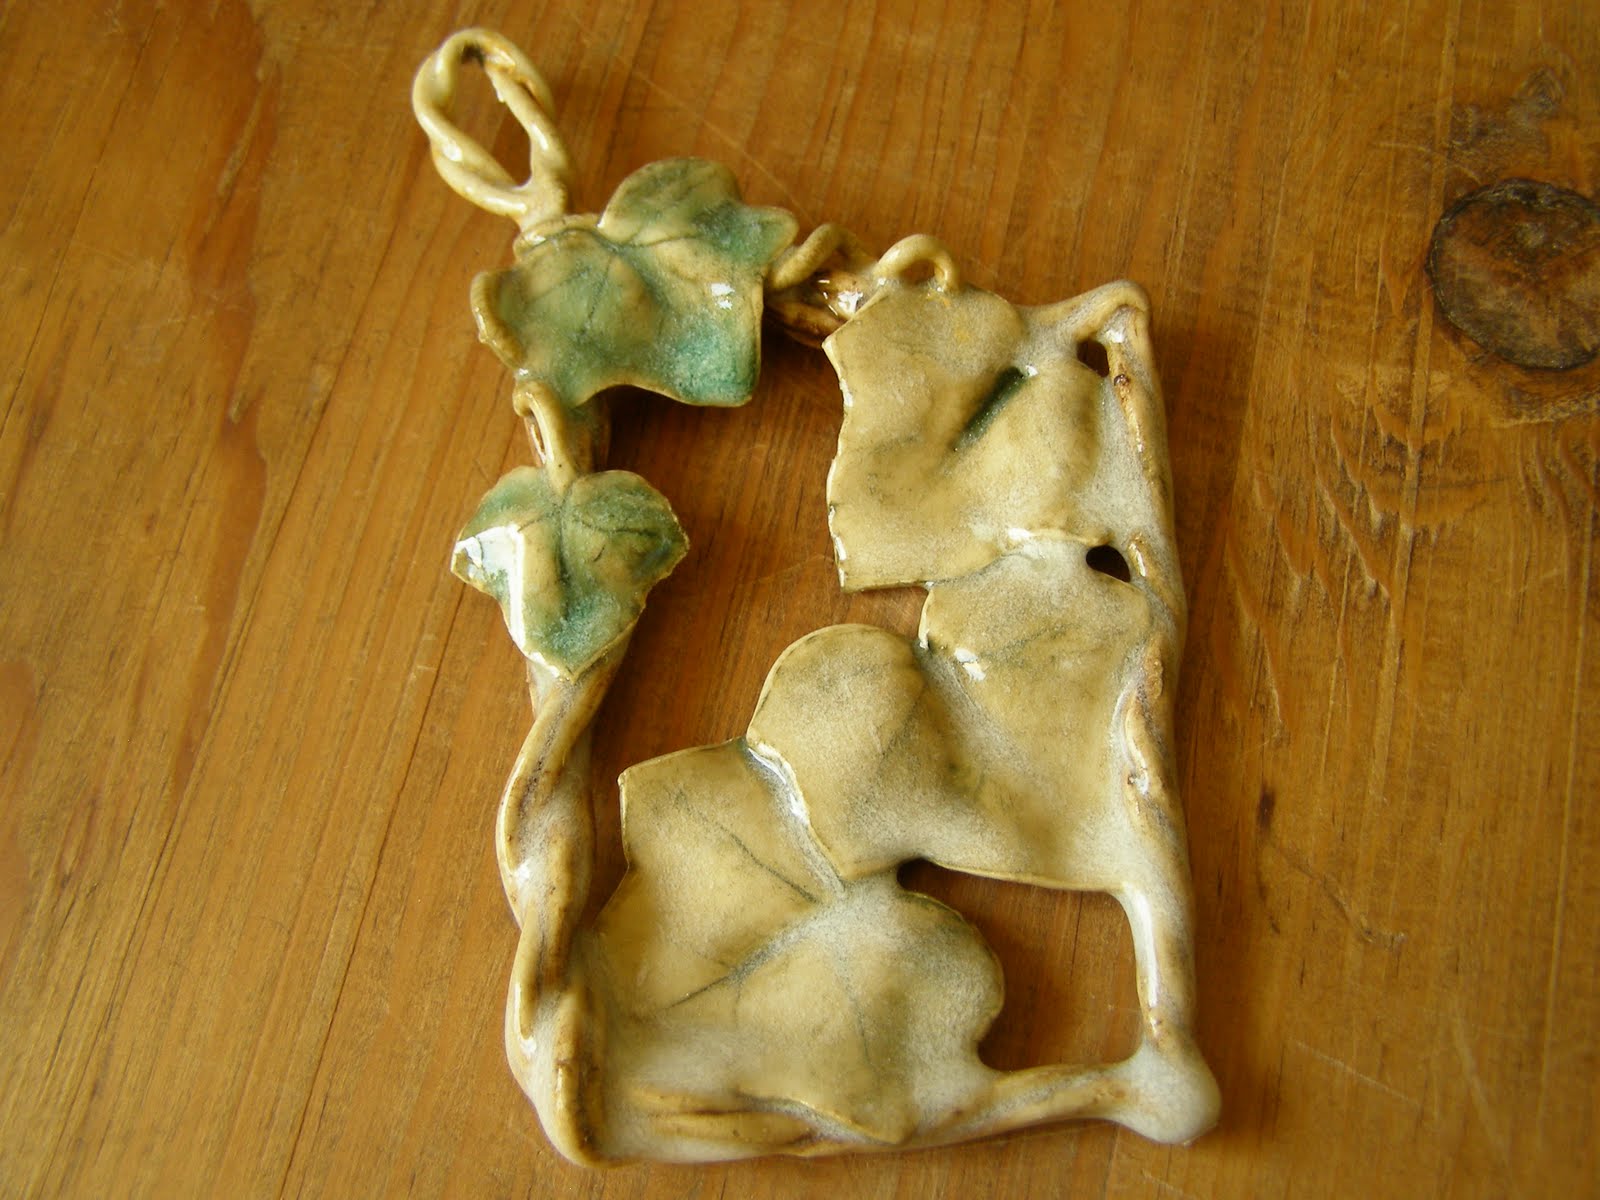 The next ornament in this series of tests had my favorite dark green underglaze, a dark brown underglaze, and a buttercup mason stain. Then I glazed the whole thing. Umm, no good. I do not like the results at all. This one will go in the shatter pile. I applied the glaze a little too thickly, but I think the main problem actually was with the cooling of the kiln. I slowcooled really well and that allows crystals to develop within the glaze. Depending on the exact glaze, sometimes the glaze turns a softer matte tone, sometimes large flower-like crystals develop, and other times it does as it did here. Partly due to the heavy application, it developed a heavy frosty appearance that obscured details. Not to my liking.
  This ornament has the same underglazes applied, but I did not apply any glaze, just fired it dry. I really like it like this. It's hard to tell in the pic, but the frame is done in the dark brown underglaze and I used the buttercup mason stain on the vine. Although there is only a subtle difference, I like the way it adds just a touch of depth and color.
 I did a similar experiment as the ornaments above with these two pendants, except my contrasting color was a cobalt/frit mixture. You can still see the frosting effect and a little loss of detail on the glazed pendant, but because the application wasn't quite as thick, the final effect is a little better. I still like the unglazed pendant better, but I can work with the glazed one too. It's nice and different. I probably won't be using this glaze on a slow cool on small items anymore.
  For now, I just want to share one more item. I really love this ornament! It is one of my favorite pieces from this firing. I have applied a combination of succesful effects to create an overall beautiful ornament. I applied sbred slip (and washed back) all over. Then I carefully applied the cobalt/frit mixture to the ribbon and bow. Next, I glazed the leaves and applied copper carb/rutile mix to them. The results include lovely accented veins showing through the minty green leaves. Also, the ribbon and bow exhibit the soft-glaze effect that I have mentioned in previous blogs caused from the frit reaching the melting point and becoming glaze-like.
Overall, this firing had some nice pieces. I lost a few more to the over-frosty effect from slow cooling and lost a beautiful large tray from bits of kiln wash falling into the glaze. I love some of the other pieces that I have run out of time to share, but will be listing them on my etsy site within the next week or two.
Also, as a side note, I have joined the Homefront Team on Etsy and created a nice treasury featuring some of the sellers.
I hope you enjoy browsing through them as I did when I created the treasury. These are all talented individuals that have some connection to the military. I love the bracelet by CandJjewelry. She incorporated a button from the Army uniform. So cute!
 This is one of my favorites and will be a (typically, late) birthday present to my dear friend Jeannette. I am thrilled with the results! I began this one with an impression from part of a stamp. I have a small handheld extruder that I used to create the very smooth vine-coil. I work with these tiny extrusions with damp hands because they dry out very easily. I also wedge a little extra moisture into the clay so it is very soft which allows me to create very supple curls and vines. I designed the vine to act as a bail for attaching to a necklace and added some of those babydoll ficus leaves that I've been enjoying lately. After bisquing, I applied a strong mix of cobalt carb with frit 3134 and washed it back a little . A little dark green underglaze added color to the leaves. I actually didn't apply any glaze, but apparently I exceeded the melting point for the frit because it added a lovely light glaze. This little beauty was fired to 2190`F in an electric kiln, with a slow rise the last 200` and a 20 minute hold at the top plus a controlled downfiring to 1400` resulting in a soft ^7 (the ^7 cone's tip was just barely touching the shelf).


 Anyway, back to the pendant and the necklace that I will be incorporating it into. The gold and reddish brown tones look wonderful with this necklace: The pendant is designed to have the necklace woven through the braided portion. I could even add a small briolette if I wanted to (and may in future pieces), but this one I will simply work with the seed beads.


 I also pulled a couple of my new beads out of the kiln already. I will write another blog on them over the next couple of days, but here's a sneak peek at a few:

